
If you face a busy workload or are leading a team, you must be able to plan and manage your work effectively. Effective planning improves your job efficiency and guarantees that you finish all of your responsibilities. You may accomplish this using a variety of programmes and software, the most common of which is Microsoft’s Office 365 Planner. In this blog post, we will explain what Microsoft office 365 Business Premium Planner is, how to use it successfully, and some of the program’s features.
What exactly is Microsoft Office 365 Planner?
Microsoft Planner is part of the Office 365 suite of products. It offers a card-based interface that allows you to plan your own or your team’s work. Planner is essentially a visual tool for tracking workloads and creating to-do lists. Planner allows you to build various work plans and maps of individual tasks, which allows you to keep track of multiple strands of work or team members’ projects. Planner is also completely linked with other Office 365 applications and services, making it a very useful software if you currently use Microsoft office 365 Business Premium.
How to Use Office 365 Planner
The instructions below will help you learn how to utilise Office 365 Planner efficiently. The software is accessible through the Planner website, but it is also feasible to install Planner on your desktop. Logging in requires an Microsoft office 365 Business Premium account. When you access the Planner hub, you will instantly see the plans in which you are engaged or that you have already developed. When you initially access the Planner hub, it is blank, but you may then create several new plans. Follow the instructions below to use the program’s basic functionalities.
1. Make a plan
To begin establishing a new plan, go to the main menu and choose ‘New Plan’. You may then give the plan a suitable name and decide whether to make it public or secret. The private setting is best suited for work entrusted just to you. When you select ‘Create Plan’, the software generates a new plan and opens it immediately.
2. Add tasks
You may now include the specific tasks that your plan or project requires. To do this, click ‘Add Task’. This opens a window where you may input the task’s name, due date, and assignee. To complete the task creation process, click the ‘Add Task’ button.
3. Edit the task
Clicking on the job allows you to amend it and add extra details. This opens the job in a new window with a variety of choices for entering more information. Here you may change the due date, add a status, and set the priority level. You can also provide other information like notes, checklists, and files. Another alternative is to colour-code your jobs using labels. This might assist show who is in charge of the work, how important it is, or what kind of activity it is. Any modifications you make will be saved automatically.
4. Mark tasks as completed
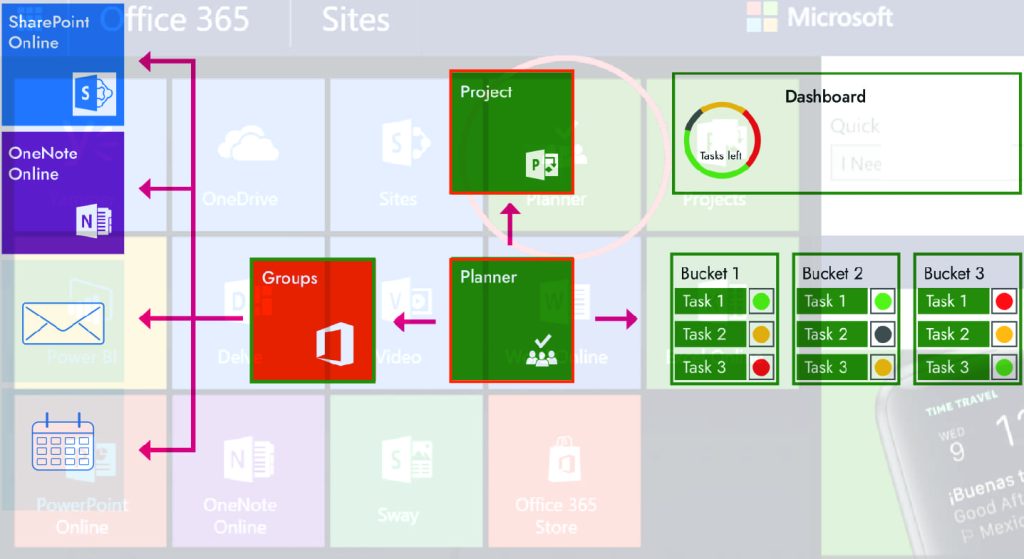
When a job is complete, you can indicate it as done in the app by updating its status under ‘Progress’. Completed tasks are filtered to prevent clutter, but you may still refer to them. Office 365 Planner sorts your tasks into ‘buckets’. Completed tasks are stored in the ‘Completed’ bucket.
5. Add more buckets
When you create a new plan, it just has the ‘To-Do’ bucket accessible, but you may add additional. You may create as many buckets as you want in a plan. You may want to include additional ones for ongoing or high-priority activities. You may add buckets by selecting ‘Add New Bucket’.
What capabilities does Planner offer?
Microsoft office 365 Business Premium Planner allows you to create precise and understandable tasks for team members. Planner not only allows you to create tasks and to-do lists, but it also makes it simple to communicate information across team members to aid in job completion. This includes the addition of papers, photos, and checklists. Planner also allows team members to discuss work and make updates. It’s a simple approach to keep your team members on track with the work at hand. Planner delivers an email notice when you assign a new task or add someone to a chat.
The software also has a ‘Charts’ feature, which allows you to follow the progress of different projects. This provides you with a comprehensive picture of the work that is currently underway and whether any activities are falling behind schedule. This function is especially handy if you manage a team, but it may also help you keep track of your personal workload and development. If you operate with numerous teams, you may establish plans for each group of individuals and grant guest access to external collaborators or new team members before they have permanent accounts.
Benefits of Using Office 365 Planner
Microsoft office 365 Business Premium Planner is useful for managing projects and workloads effectively. It also allows you to rapidly assess how work is developing. Another advantage of utilising Planner is that it integrates with other Office 365 services like Microsoft Teams. This makes it easy to integrate with other services and promotes efficiency. This feature suggests that it may be a useful choice for teams who operate remotely. Another advantage of utilising Office 365, particularly for remote employees, is that it facilitates communication and cooperation by allowing users to exchange files and coordinate tasks.

Tips for utilising Microsoft Office 365 Planner
Here are some ideas to help you get the most of Office 365 Planner. Using these tips helps you keep your tasks ordered and allows you to access them quickly and simply. This increases efficiency and minimises your chances of becoming dissatisfied with the programme. Try these ideas when using Microsoft office 365 Business Premium Planner:
Encourage sharing
The Planner app provides several chances for information sharing, so encouraging your team to exchange ideas and files might be beneficial. You may set an example by sharing frequent progress updates with the team based on data from the ‘Charts’ view and adding extra details to tasks. Planner allows you to submit a wide range of assets, so urge your team to take full advantage of it. This allows everyone to stay organised and monitor key files in a single programme.
Use the bucket feature
Making full use of the buckets function is beneficial since it keeps your duties ordered. This is especially beneficial for big projects with a high number of tasks or regular upgrades. Using buckets provides everyone using Planner with a clear picture of what’s required and how a project is progressing at any given time. Buckets can also help to identify priorities. It can be worth asking your team which bucket labels they believe are most useful for your project.
Adding plans to Teams
You may create a tab for your plans in Microsoft Teams. This makes them convenient to consult during team meetings and video chats. This can also foster greater communication and collaboration among team members, as well as openness regarding each member’s work.
Use labels
The ‘Labels’ option is useful, especially if you’re handling a big number of jobs with varying needs and levels of importance. Labels can help you immediately determine the nature of a task, such as its importance or who is working on it. Similarly to utilising buckets, ask your team members what form of labelling they believe is most suited to your project’s needs.
Conclusion
Finally, Microsoft office 365 Business Premium provides a great option for improving work management with its revolutionary Planner feature. Businesses can use the easy layout, collaborative capabilities, and seamless interaction with other Office 365 products to improve their task management processes and enhance productivity like never before. Office 365 Planner provides a centralised platform for effective project management, including task assignment and deadline scheduling, as well as progress tracking and team communication.
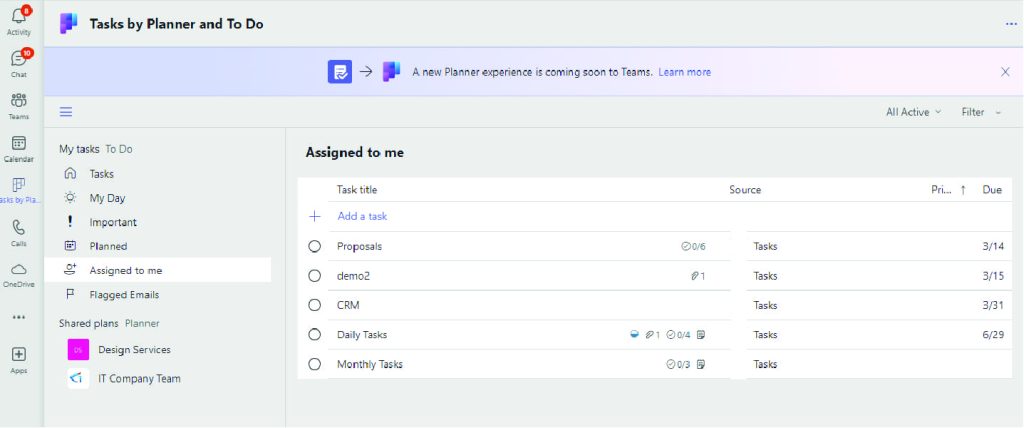
To access Microsoft Office 365 Planner, you can log in to your Office 365 account through your web browser and navigate to the Planner app. Alternatively, you can download the Planner app from the Microsoft Store on your device.
To create a new task in Microsoft Office 365 Planner, simply navigate to the desired plan, click on the “Add task” button, fill in the task details such as title, description, due date, and assign it to a team member if necessary.
1. Visualised status insights: Planner automatically shows task status in bar and pie charts.
2. Attachments: Add links or files to tasks.
3. Organise and filter tasks: Sort tasks by deadline.
4. Use tags: Use hashtags in task titles to organise activities across to-do lists.
5. Assigning tasks helps contributors understand what they should be focusing on across several plans.
6. Use buckets: Use the buckets feature to keep your tasks organised. This is ideal for big projects with a large number of tasks and frequent changes.